

How To Build A Garden Windmill
Arthur strives to balance aesthetics, functionality, and quality with costs when planning DIY projects in the home and garden.
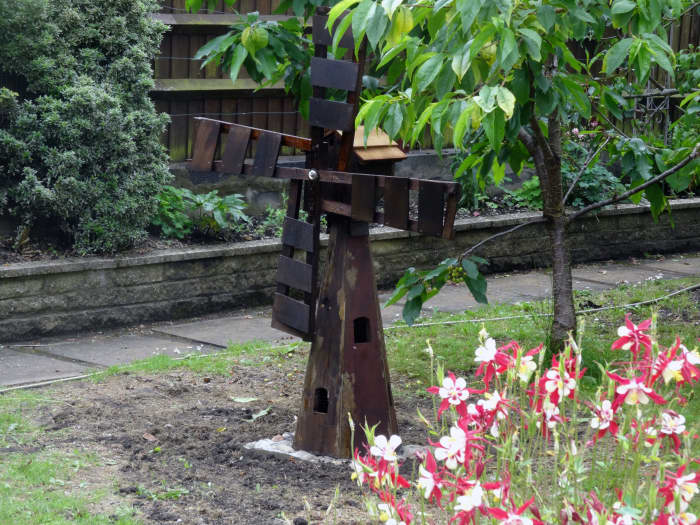
Old windmill rebuilt and restored
Flaws With Wooden Garden Ornaments
Attractive as they may look when new, wooden garden ornaments (including plant potters) are all too often made from softwood that hasn't been properly pressure treated. Invariably, within just a few years, they start to rot.
Under the British cold and damp climate, it doesn't matter how frequently you apply wood preserver, within five years, they are but a relic of their former self. This occurred with our windmill.
The other flaw with our original windmill was that the sails never worked. They would spin easily enough if you pushed them, but they never turned in the wind.
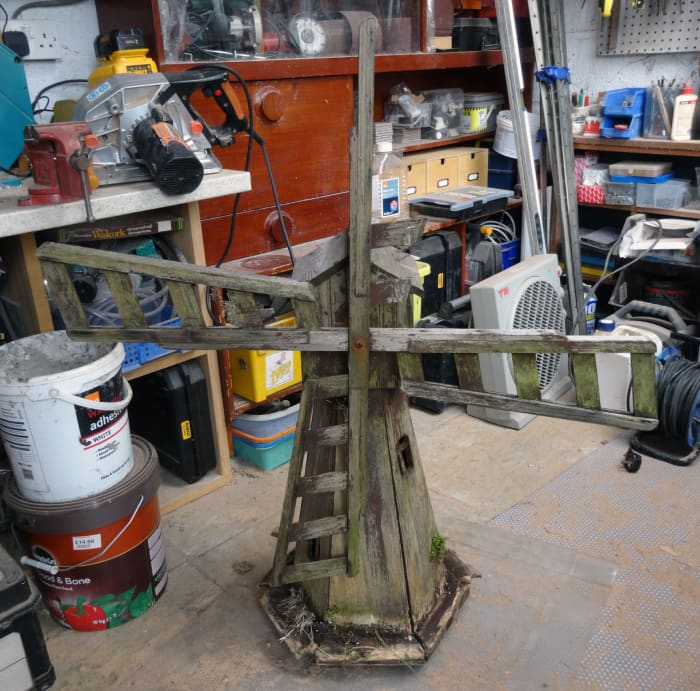
The original windmill in a poor state of repair after 9 years of weathering.
A Gift of Appreciation
The windmill, which took pride of place as a garden feature in the middle of our lawn, was a 'thank you' gift from a neighbour for helping them one summer to clear and tidy their garden.
It's not the first time they've shown their appreciation with gifts paid in kind for helping them. The previous year they bought me a statue to keep my other statue company at the end of the garden. This was a 'thank you' when I helped them convert their Second World War brick and concrete air raid shelter into a garden shed. Then on another occasion, they gave me a tool belt as appreciation for some DIY work I did for them.
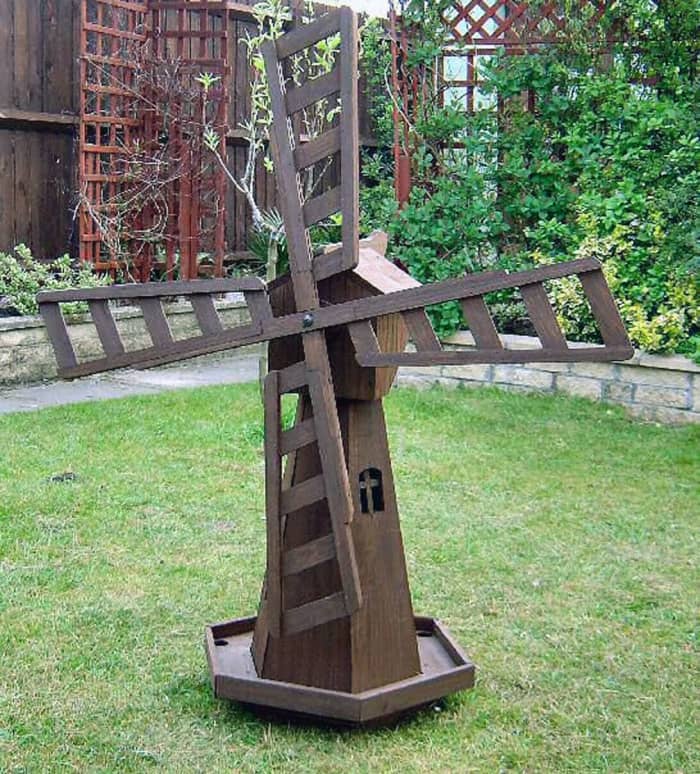
The original windmill when it was new.
Restoration or Renovation
In deciding to repair the windmill, I had to choose on whether to restore or renovate it. Restoration would have meant retaining as much of the original as possible and faithfully replicating any parts replaced so it would end up being identical to its original form. Whereas with renovation my options are more liberal, giving me opportunities to make improvements and modifications to the original design.
I opted for the latter because I wanted to make a modified windmill that's slightly taller and redesign the sails so they'll be more responsive to wind. Plus I also wanted to replace most of the original wood with wood that's more impervious to rot.
Restore or Replace
Rustic Design
I could have gone to great lengths to make the windmill look beautiful by rubbing down all the woodwork and staining it with quality wood preserver.
However, I happen to like the rustic look. Therefore, I decide to sometimes make things to a rustic rather than a polished and finished design. So to create the rustic look, I only lightly sanded the windmill, and applied just one thin coat of a cheap wood preserver which is normally used for fences.
Sourcing the Material
For the new build, I wanted wood that doesn't rot easily. I wanted to keep with my desire to recycle whenever possible and source salvaged wood.
Therefore, to meet these two requirements, the wood chosen for this project was:
- 3/4 inch exterior plywood salvaged from the walls of the original shed in our back garden when I replaced it with a brick one.
- Teak salvaged from our old French doors when we replaced them with modern uPVC doors, and
- Red cedar from grade 'A' cedar wood tiles imported from Canada leftover from when we built our conservatory.
The plywood would be used for the tower with the teak and red cedar being used to construct new sails.
The shaft for the new sails would be reconstructed from an assortment of scrap metal in my workshop, as appropriate.
Salvaging What I Could From the Original
Although I was replacing the rotten wood with wood that's more impervious to rot, I was keen to salvage any wood from the original windmill that had not rotted. On close inspection, after having dismantled the windmill, the only good bits of wood was the top of the tower and parts of the cap; both having been protected from the worst of the elements.
The walls of the cap had been protected from the rain by the roof and the top of the tower by the cap; albeit the only parts of the cap that had survived the ravages of time were the front wall and the two sides.
Read More From Dengarden
Therefore, I put these good bits aside to incorporate into the rebuild, and discarded the rest for the bonfire.
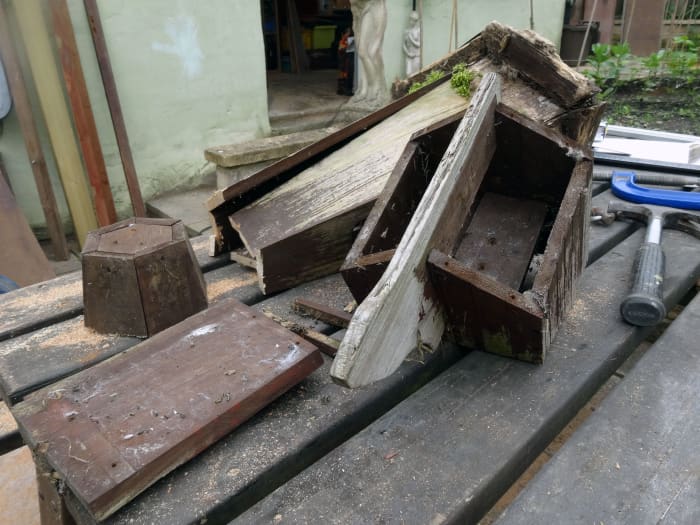
Wood salvaged from the old windmill.
Using the Original as a Template Guide
The tower of the windmill is a hexagon that's bigger at the base and smaller at the top. Trying to calculate all the angles for me would be difficult, so I used one of the rotten side panels as a template.
As I wanted the remodelled windmill a little taller, I placed one of the rotten panels over the 3/4 inch plywood that would make the panel and drew a pencil line along the old panel. I then removed the old piece and then used a straight edge to extend the line a few inches in both directions so that the top would tapper off and the base would be wider. The purpose of tapering the top is so that the top of the original tower would fit over the top of the new tower to act as a fixing point to hold the top of the new tower together.
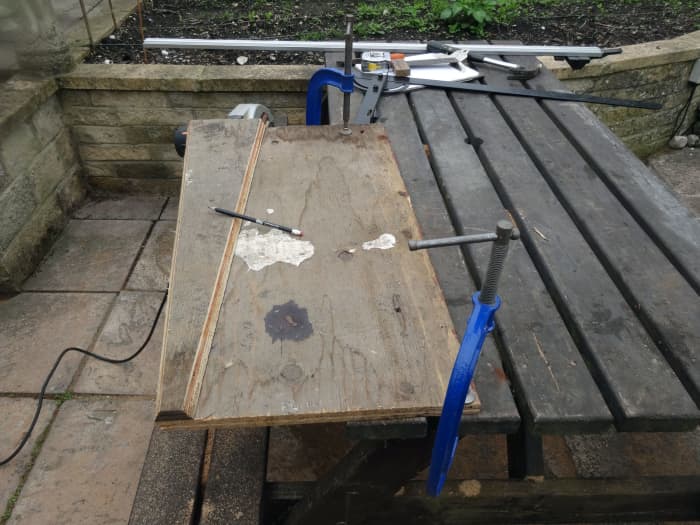
Marking and cutting the new side walls, having used the original wood as a template.
Remaking the Windows to the Original Design
Again, I used the original as a template, this time for marking out the windows as follows:
- I placed one of the original side panels over the new cut-out, and marked around the inside of the window with a pencil.
- I then drilled two holes on the bottom inside corners of the window large enough to fit the blade of my jig saw, and
- Then followed the pencil line with my jig saw to cut out the window shape.
When I dismantled the original windmill, I found it to be home to a family of snails, obviously using the windows as access. It also housed spiders and other insects, who are welcomed guests.
However, in a bid to keep snails out of the remake I pinned garden netting over the inside of each window, pinning it in place with small pieces of teak beading.
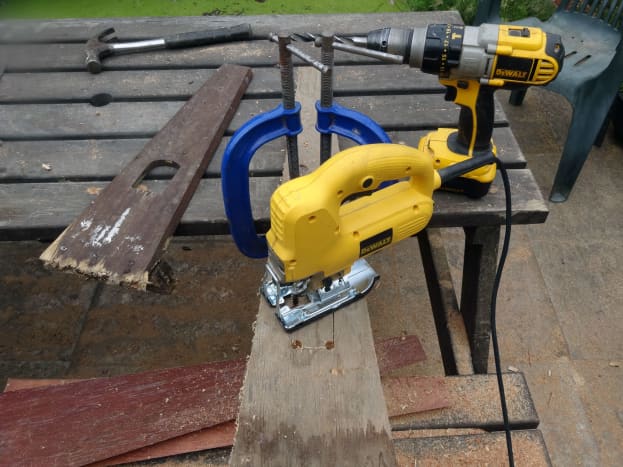


Using the original as a template to mark and cut the new windows.
Lighting Up
I don't have any current plans to add lights but the ornamental windmill we have on our decking has solar powered LED lights that glow through the windows after dark; charged up during the day from a solar cell fixed to the roof.
So to keep my options open, before assembling the tower, I cut one of the side panels into two parts to create a hatch at the rear of the windmill; held in place with a hook and eye. Thus giving me relatively easy access to the inside in the event that I decided to fit any LED lighting in the future; especially with technology always improving and prices coming down.
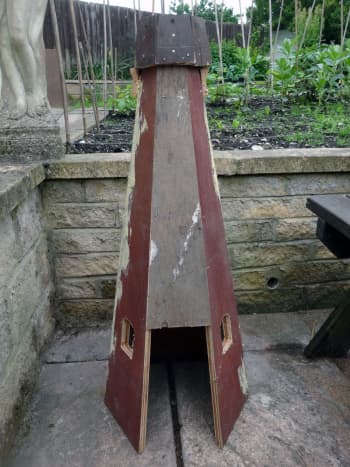


Opening in the back of the windmill for access.
Base Assembly
With the original windmill, I had to anchor it down with large tent pegs to prevent it being blown over in the wind. Therefore, for the remake, I set the base in a slab of concrete, as follows:
- I made shuttering (formwork) from scrap wood, about two inches high.
- I placed the windmill in the middle of the formwork.
- Made concrete to a mix of 1:2:3, one part cement, two parts sand and three parts gravel.
- While mixing the concrete with water I also added a squirt of washing up liquid; as that makes the concrete smoother and easier to mix.
- I then filled the formwork with concrete.
- Partially pushed large pebbles into the concrete for decoration.
- Waited for a couple of days for the concrete to set before removing the shuttering.
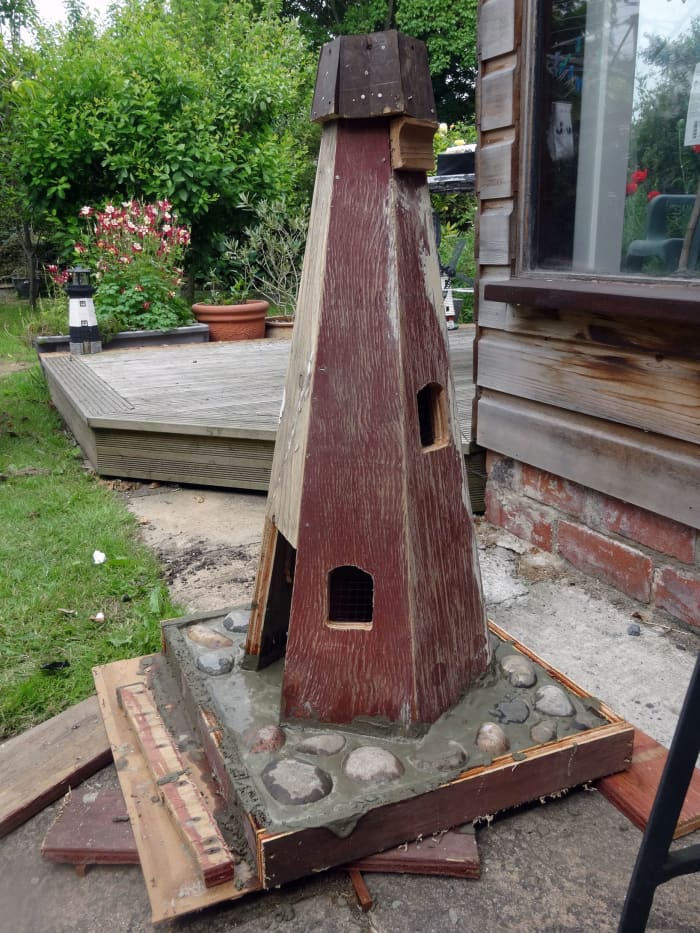
Base of the windmill set in concrete to prevent it being blown over by the wind.
Sails Design
The sails didn't really work on the original windmill; the spindle was loose enough to spin, but the sails just didn't catch with wind. Unlike the ornamental windmill on our decking where with the slightest bit of wind the sails turn.
Therefore, in redesigning the sails I had two requirements:
- That the sails would turn freely and easily on the spindle, but held firmly enough to prevent wobble which can inhibit spin.
- To design sails that catches the wind like a propeller.
The former was easy enough; amongst all the scrap metal in my workshop I found:
- A metal rod with screw holes at both ends for the main spindle.
- Copper pipe that would be ideal as spacers to keep the sails far enough away from the windmill so they could turn unhindered, and to keep the metal spindle in position, and
- Large washers to keep the ends in place with screws.
However, the latter has proved to be more challenging.
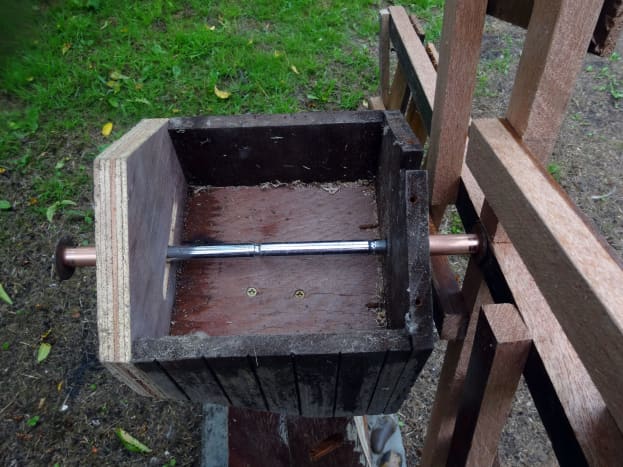


The sails spindle made from salvaged metal rod and copper pipe.
Work in Progress
My knowledge of aerodynamics is limited, so designing sails that catch the wind and turn is a stab in the dark.
Although I used salvaged teak wood for the framework (a rather clunky design) to keep the weight down, I used cedar wood for the infills; cedar being a very lightweight wood. I also angled the framework with the concept that it might catch the wind better.
However, once assembled and tested, although they do turn a little if it's very windy, and provided the wind is in the right direction, they don't turn as effectively as I would like.
Therefore, over the coming months I will be reading up on aerodynamics and windmill sail designs, with the intention of remaking the sails to be more effective; and perhaps a little more elegant and realistic!
In this respect, if anyone has any tips they could offer me I would be most grateful.
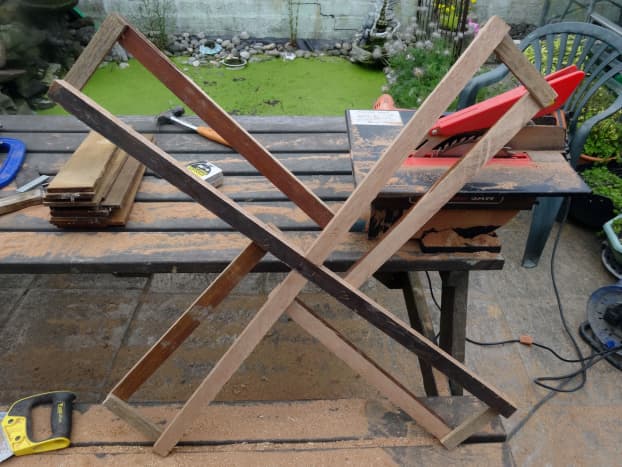
Sail frames made from salvaged teak.
The Cap
The technical name for the housing above the tower, where all the gears and cogs for the sails are housed, is the cap.
The Roof
Once the metal rod for the spindle was thread through the cap for the sails, and the sails were bolted in place I could fit the new roof. The original roof had only been of softwood and therefore, although it had protected the cap below, overtime it had rotted quite badly; and needed replacing.
For the new roof I used a certified 'Grade A' cedar wood roof tile (imported from Canada), leftover from when I roofed our new conservatory. Being cedar wood it's something that's going to last for decades and give good protection to the cap below.
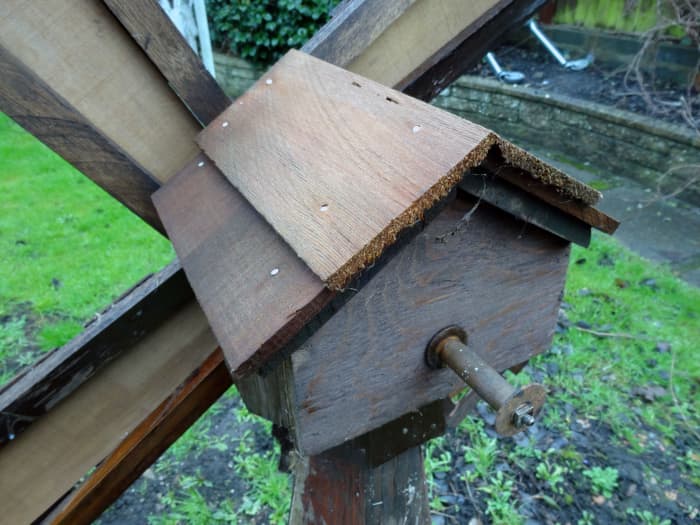
Windmill's roof made with red cedar tiles.
How to Guide to Making a Garden Windmill
This article is accurate and true to the best of the author's knowledge. Content is for informational or entertainment purposes only and does not substitute for personal counsel or professional advice in business, financial, legal, or technical matters.
Larry Rankin from Oklahoma on January 04, 2017:
Wonderful project!
How To Build A Garden Windmill
Source: https://dengarden.com/landscaping/renovate-garden-windmill
Posted by: takahashipleataring.blogspot.com
0 Response to "How To Build A Garden Windmill"
Post a Comment